Create Authoring: Adjusting Object Pivot Points and Rotations

2024 is finally here! To pair with the new year we have a new tip to help center you as you take on new projects! Time to get started and just as the earth keeps on rotating, sometimes you want to rotate objects in Create. With simple 3D elements the center is often well defined and logical, but as you start working with more advanced geometries the “middle” becomes a little more nebulous. What if I told you there’s a tool built into Create that can give you customizable control of this topic?
Enter Pivot points. Conveniently located in the object properties tab of any object you click on, the pivot section gives you full control over where your midpoint is located. 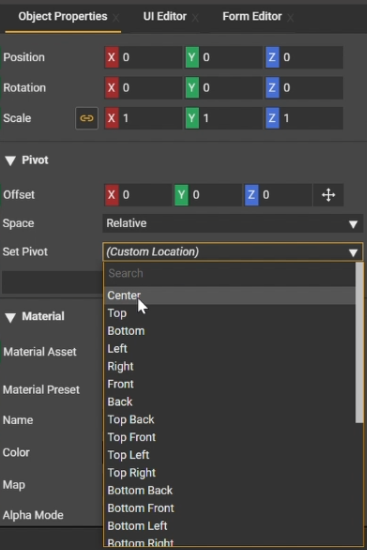
When you import your objects into Create your pivot points will be set to the custom locations specified in whatever 3D modeling software was used to design the part. But don’t worry, even if the pivots are in less than ideal positions there’s no need to edit and re-export your models, simply click the ‘Set Pivot’ drop down menu and choose where you’d like the new pivot to be positioned.
The most commonly used selection is the center option which calculates a mathematical center for even the most unique geometries.
Sometimes when animating elements of a model it can be helpful to move pivot points away from the center, making animations look more representative of the physical object. Take for example opening a door, if we were to simply center the pivot point and rotate 90 degrees the result would be less than convincing. 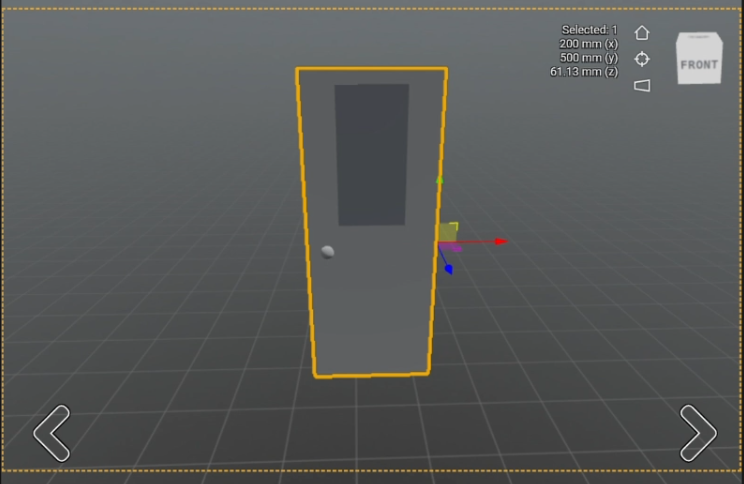
But if we choose front right as our midpoint the door performs as expected.
Hope this tip helps you center yourself and your projects as we venture into this new year of 2024. Happy authoring!
-

Thanks Corey!
Crosslinking this article as well, in case helpful.
0
Please sign in to leave a comment.
Comments
1 comment