Create Authoring: Creating and Translating Deformables
In Create we provide a collection of deformable objects that you can use in your projects. These deformable objects are created using a 3rd party application. In this example we are using 3ds max for the creation and setup.

To control the deformation we use an object modifier called “Skin”. This modifier links an object's geometry(mesh), in this case the vertices, to another object's transform to help control the deformation. We will refer to these linked object's as helpers. These helpers can be just about any other object in 3ds max so long as it has a transform (move, rotate and scale). When the transform of a helper changes, the linked geometry will deform in relation to it.
Each vertex in a skinned mesh has a weight value of 0 - 1.0. Weight determines how much the vertex will follow each helper object. This value must add up to 1 and will be split between multiple helpers if more than one is assigned to control a vertex.
For example, when a vertex has 2 helpers:
If “Helper01” has a weight of 0.75 (75%) then “Helper02” will have a weight of 0.25(25%) resulting in a value of 1 when added together.
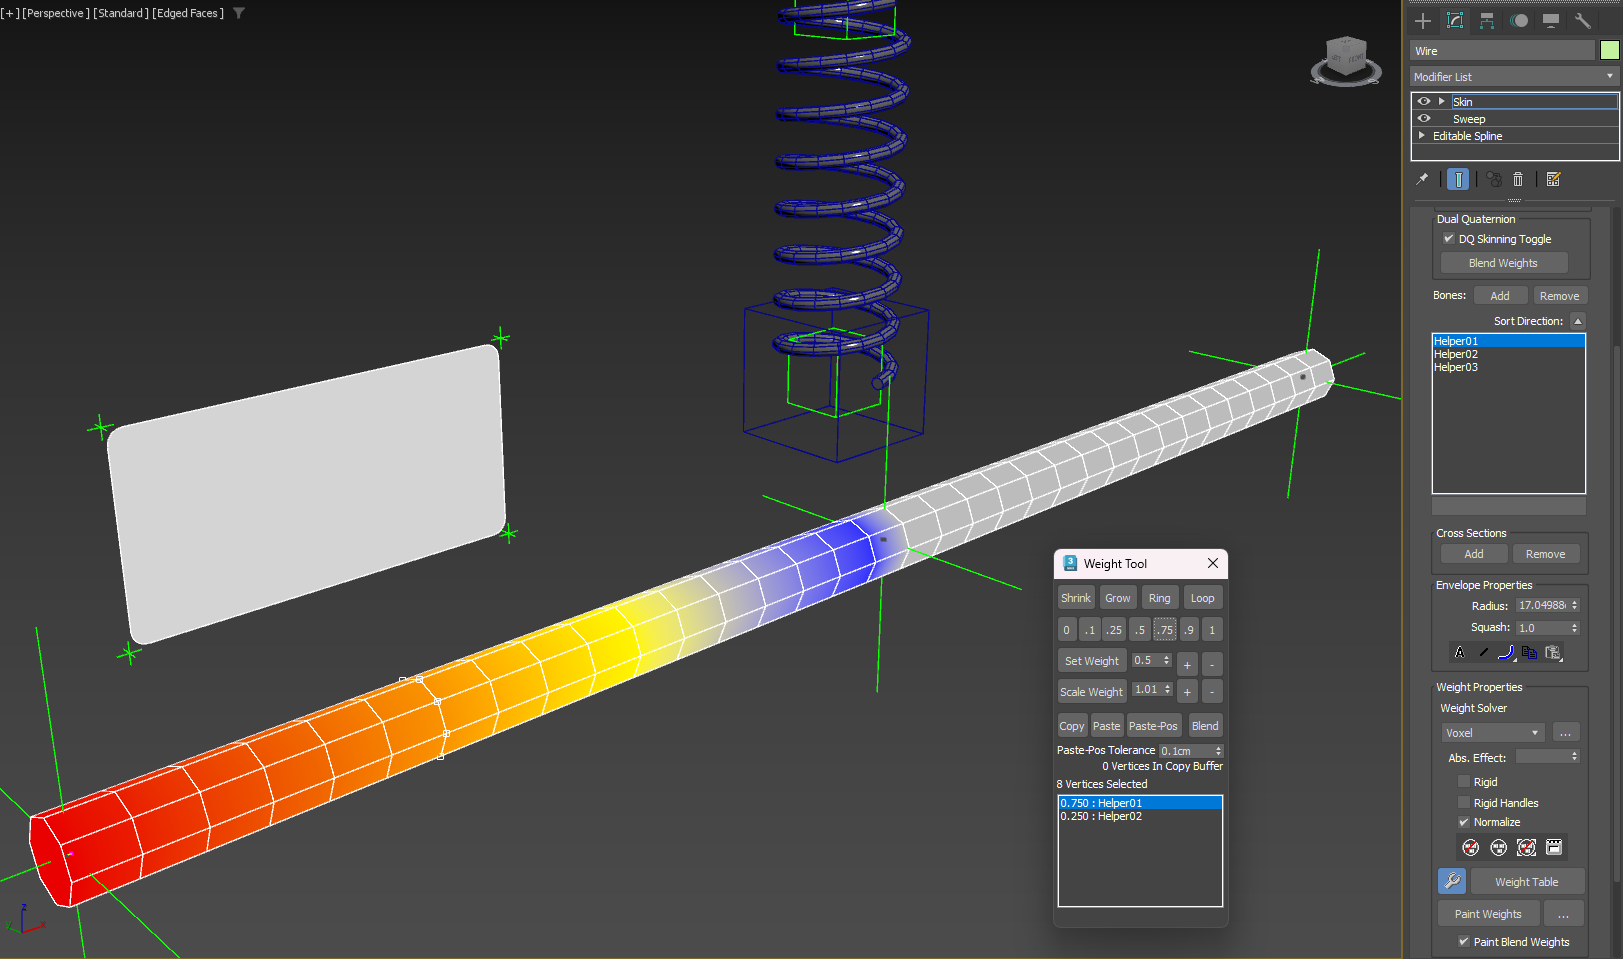
There are many ways to spread the weight of the assigned helpers across an object's vertices within 3ds max by using automatic weight solvers, 3D painting or manual assignment of helpers and weights. Depending on the deforming requirements clever planning must be made on how best to set up your object to be deformed.
Each 3D application capable of creating deformable objects may have a slightly different set of tools and processes to achieve similar results but they all use the same underlying idea of linking an object's vertices to another object through a weighted system.
For example:
- In Blender 3D one can use an Armature object and bones with weighted vertices.
- In Cinema 4D one can use a Skin object with bone weighted vertices.
Exporting
Once you're satisfied with your deformable object you can export the collection from 3ds max into the autodesk fbx format. When exporting, you will need to include the “Animation” and “Deformations” categories. To include animation, the “Bake Animation” category should also be enabled.
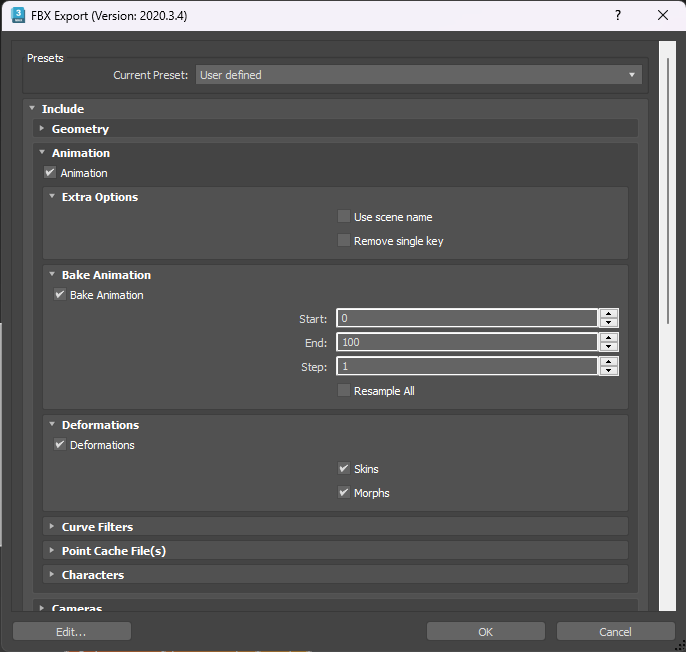
Note: it is possible to use an application's range of animation tools to achieve a complex animation of any helpers but the end result must be baked to basic transform animations for compatibility.
Importing into Create
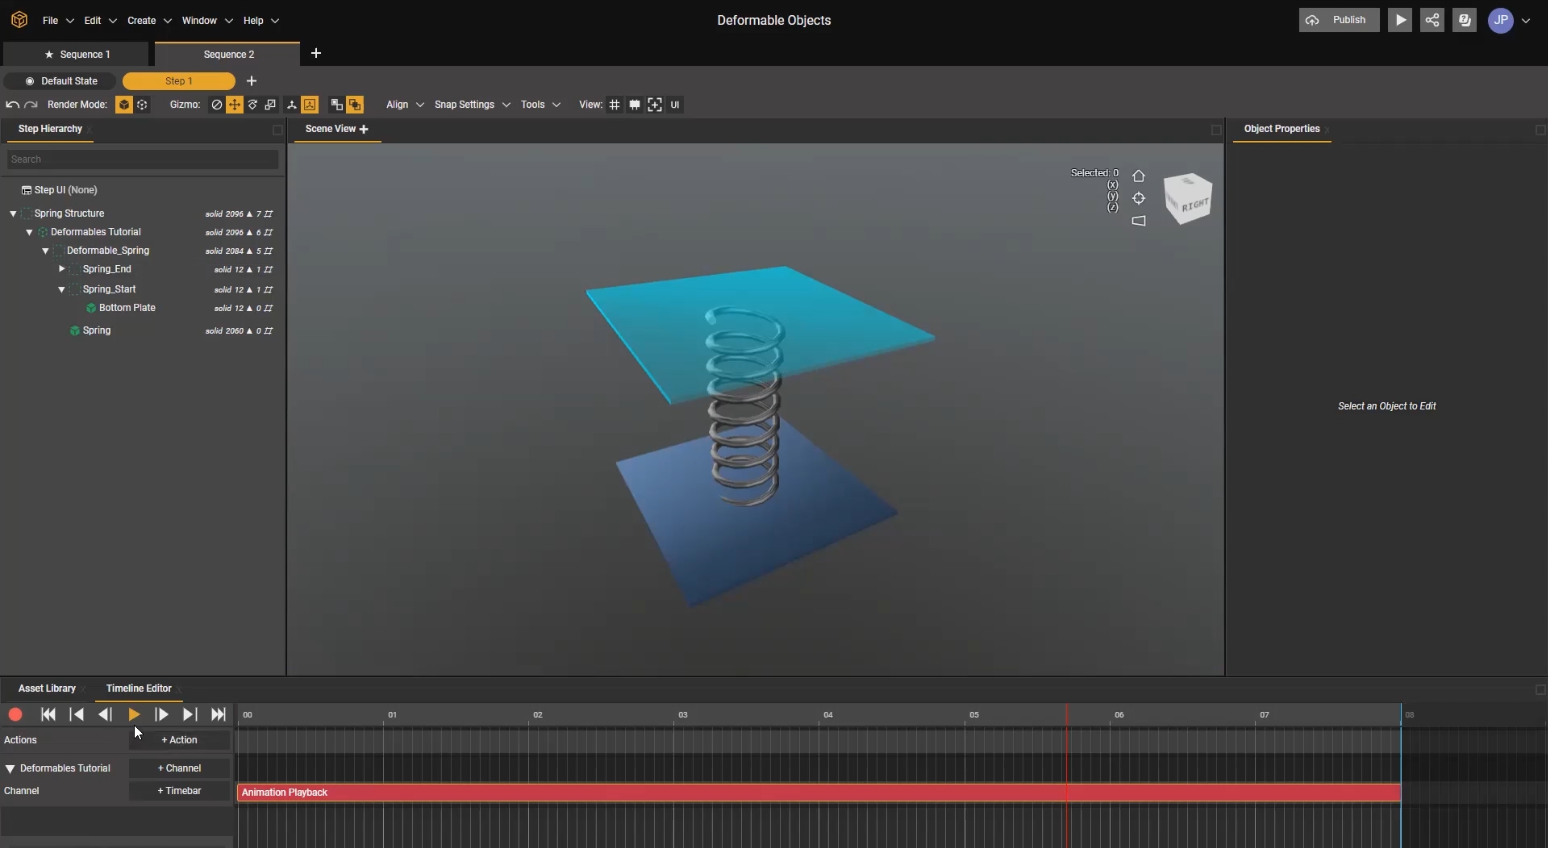
In Create we only need to drag this fbx into the asset library to use it in a project. Once in the library we can add it to the project by dragging it into the scene view or the step hierarchy.
If we want to use animation that was exported with the fbx, we can add the top object into the timeline and add the animation timebar to it.
Important
A deformable asset can be added to another object's hierarchy structure or have other assets added into its own hierarchy. However, the original object's and structure of the deformable must be retained.
Note: If you require editing the hierarchy structure it is recommended to do so in the application it was created in originally.
Deformables can help an author achieve more flexible animations in Create. Feel free to share your setup in the comments!
-

This is awesome! Thanks Jared!
0
Please sign in to leave a comment.
Comments
1 comment